Sound deadening was my second step, and it was more research-heavy than I expected.
What I Did
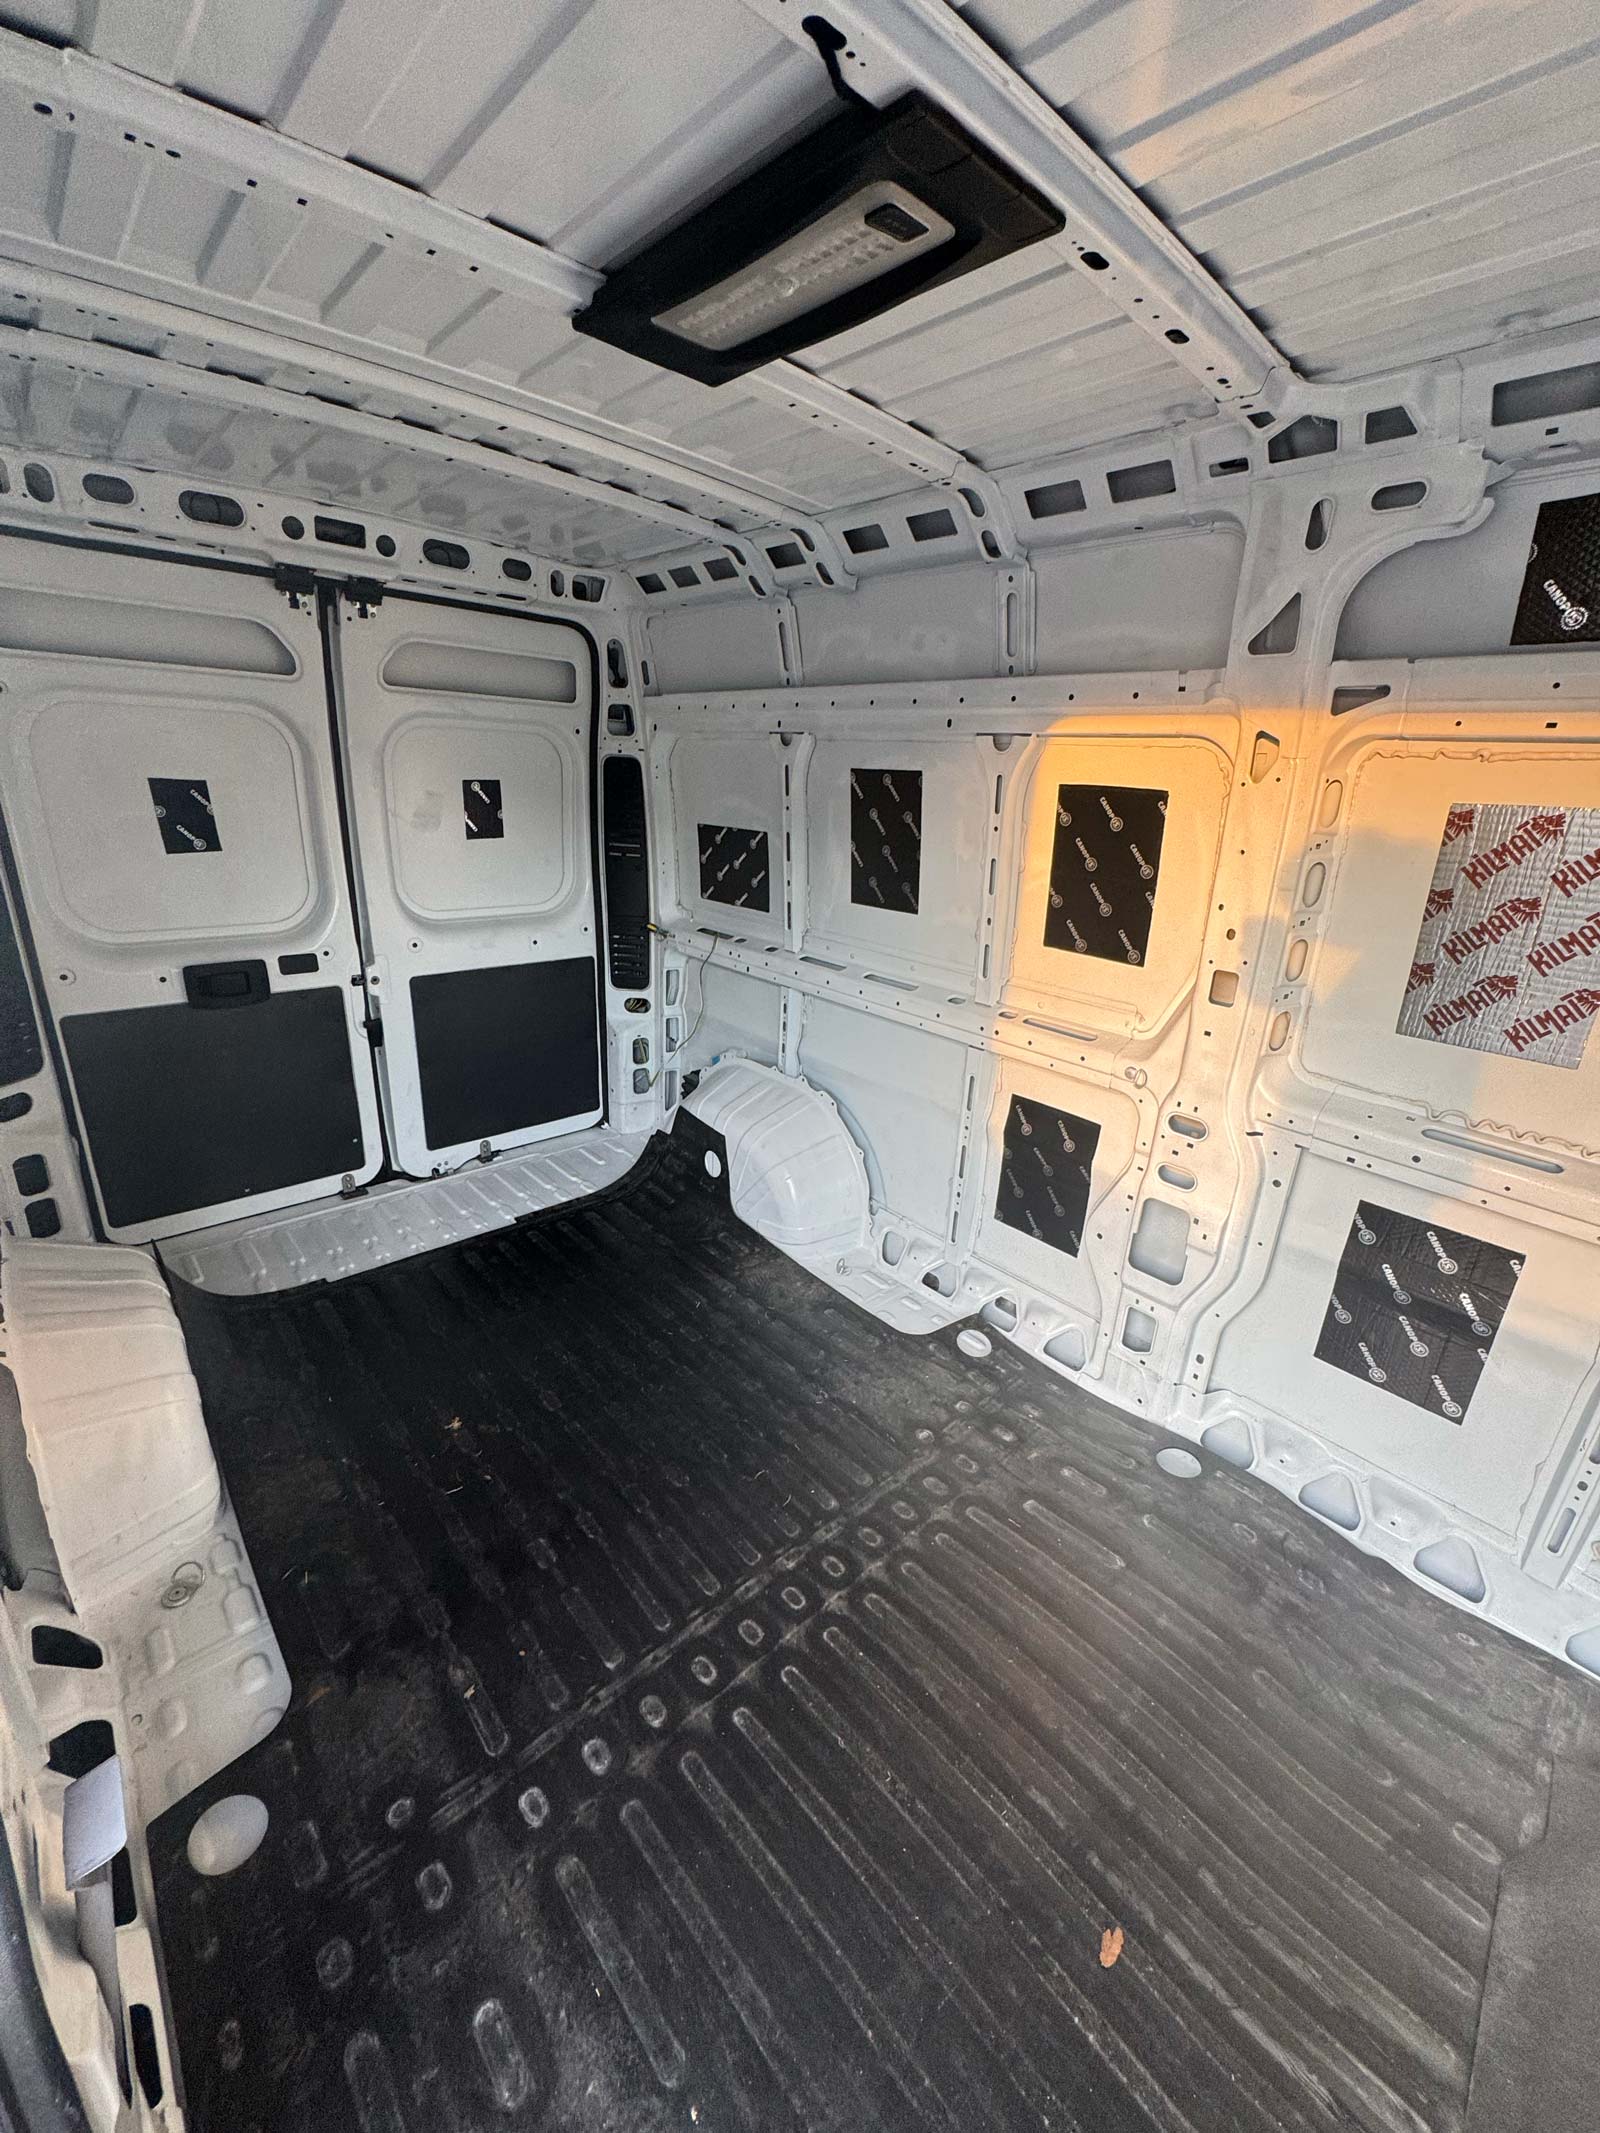
I went down a serious research hole deciding between Kilmat and Canopus. Most van builders use Kilmat, which made it feel like the safe choice. But after digging into independent testing, I found that Canopus actually performed better in several categories.
This article helped make the decision: https://resonixsoundsolutions.com/blogs/resources/what-is-the-best-sound-deadening-material-independent-testing-data
In the end, I bought one box of each so I could compare them myself.
A few important things I learned: Wear gloves—the foil edges are extremely sharp and will slice your fingers easily. Temperature matters more than you think. I made the mistake of starting this on a cool fall evening. The adhesive didn't stick well because the van itself was cold.
If you're working in cooler temperatures, you need a heat source. I used a hair dryer to warm the metal and the sound deadening sheets, which helped the adhesive bond properly.
The install itself is simple, just time-consuming. I based placement on reference photos from other van builds. I fully covered the wheel wells first, then worked outward across the rest of the van. You don't need to cover every square inch—strategic placement makes a noticeable difference.
Why This Step Matters
Sound deadening significantly reduces road noise and vibration, making the van feel more like a camper and less like a metal box on wheels. It also helps with temperature regulation by adding a thermal barrier.
Products I Used
Note: These are affiliate links. I may earn a small commission at no extra cost to you.
Video
You can see a short walkthrough here:
Watch on YouTube